
Compute instances have always been fast to launch and easy to manage. They’ve also been container-based by default, which is great for most workloads.
Now you can choose a different runtime when you create an instance: a virtual machine (VM). This gives you a full Linux server when you need one, without changing how you pick hardware, regions, or connectivity in the console.
Why we added VMs
Some workflows don’t fit cleanly inside a container. People hit this when they need system-level tools, services that expect “real server” behavior, or full control over the OS.
Virtual machines are built for that. They’re the right choice when you need sudo access, OS-level package installs, or deeper system configuration.
When to use a VM vs a container
If you’re unsure, start with a container. It’s usually the quickest way to get work done.
Pick a container when you want a managed runtime for scripts, apps, and standard model workloads, and you don’t want to manage the operating system.
Pick a VM when you need full OS control. That includes sudo, system services, OS package managers, and workloads that assume a traditional Linux server.
Learn more about the differences between VMs and containers
What’s included in the first VM release
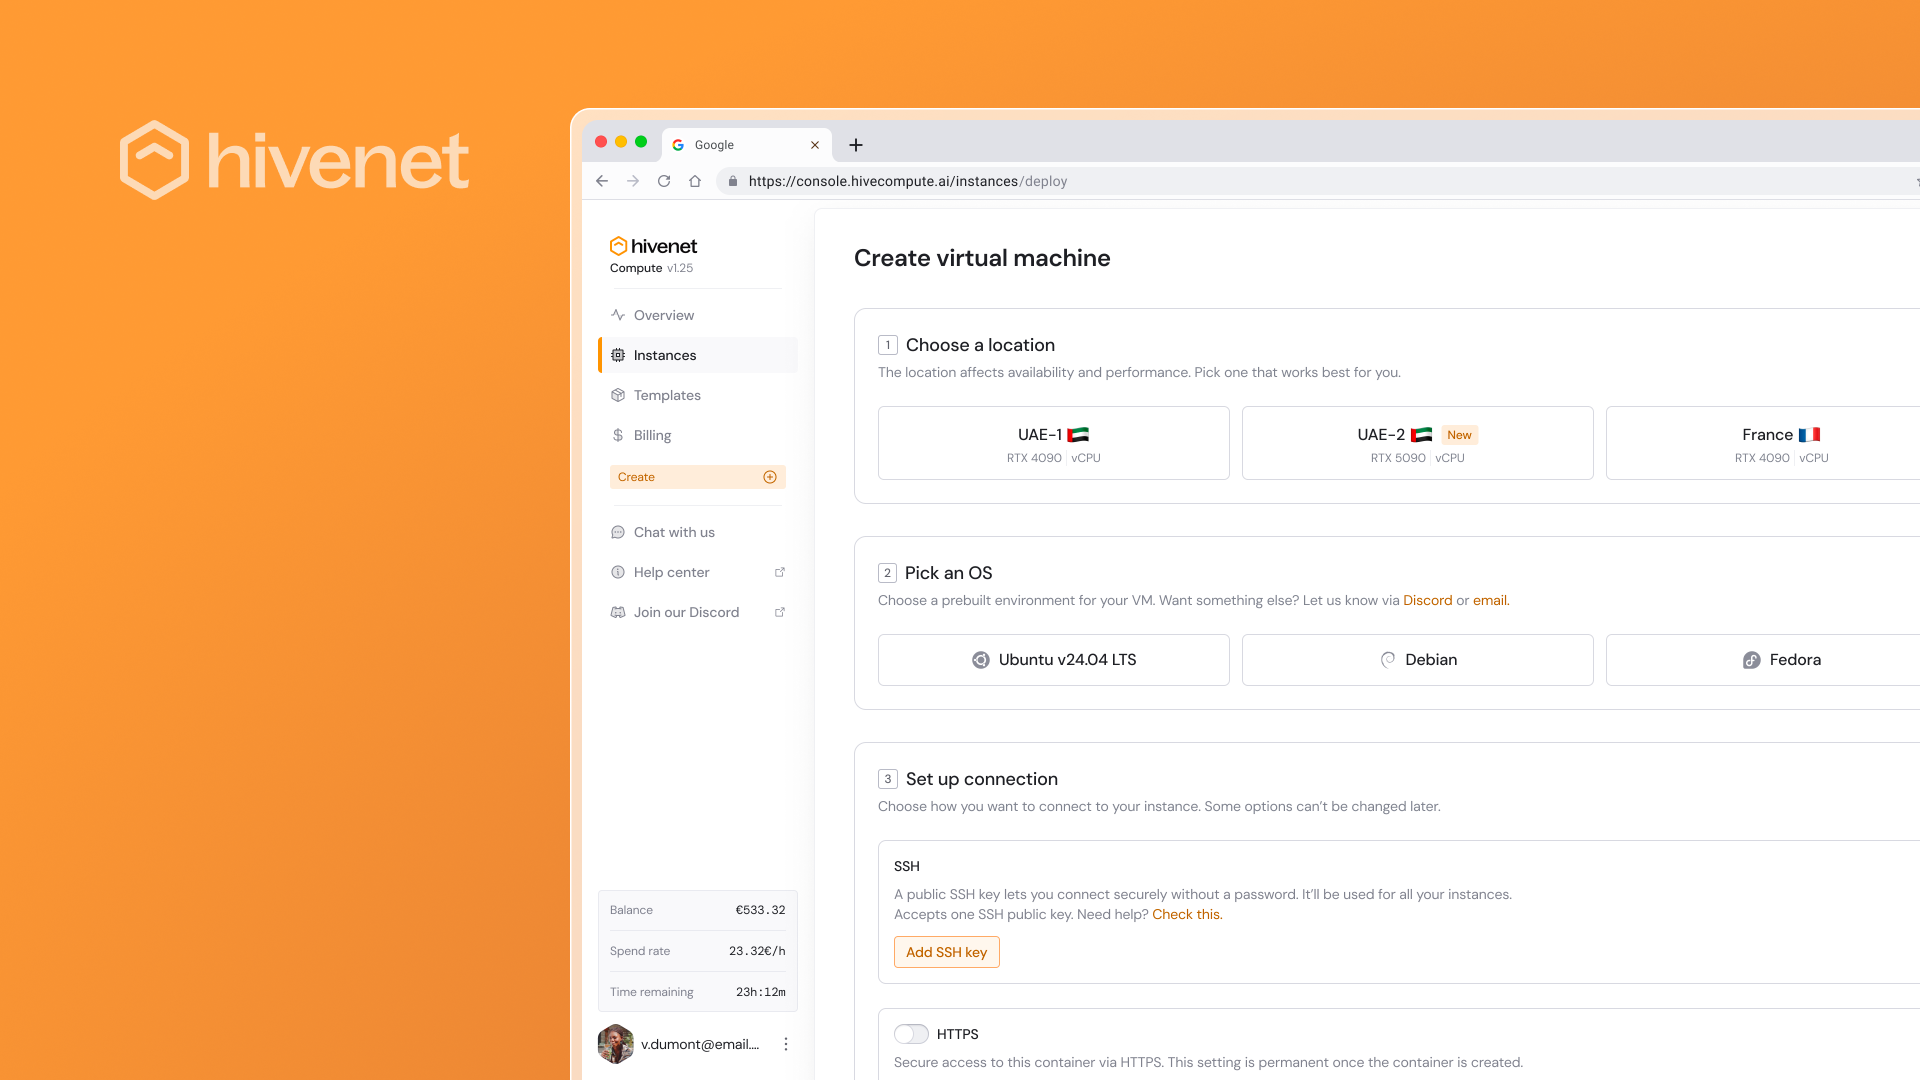
You’ll see VMs in the same “Create” flow you already use:
- You choose whether you’re launching a Container or a Virtual machine.
- You pick a location and a setup (GPU or vCPU).
- For containers, you pick a template. For VMs, you pick an operating system image (standard Linux distributions).
- You configure connectivity, including SSH access. You can also enable HTTPS, TCP, or UDP ports when your workload needs them.
How to launch your first VM
- Sign in to Compute and open the console.
- Click Create.
- Select Virtual machine.
- Choose a location and the hardware setup you want.
- Pick an OS.
- Add your SSH public key under Connectivity.
- Create the VM, wait for it to reach Running, then copy the SSH command from the instance page to connect.
What stays the same
You still manage everything from the same Instances page.
You can still stop an instance when you’re not using it and only pay while it’s running. Stopped instances aren’t kept forever, so treat “stop” as a pause, not long-term storage.
Try Compute today
Open the console, click Create, choose Virtual machine, and launch a Linux server with the hardware you need. Start small, prove the setup, then scale up when it’s doing real work.
